Monday, December 04, 2006

Scanning ...

40M a picture, loud and clear ...

It's filling up my hard drive quickly.

Tuesday, November 28, 2006

Thanksgiving Trip

During the Thanksgiving holiday of 2006, we went on a journey from Silicon Valley to the Death Valley, the city of Las Vegas, and turned around after a visit to the Hoover Dam on the border of Nevada and Arizona. The entire trip took 3 days and covered a distance of about 1200 miles (1900 kilometers). It is our longest road trip so far.

Day 1: Mountain View to Ridgecrest, 350 miles
Day 2: Ridgecrest, Death Valley, Middle of Nowhere, Vegas, 280 miles
Day 3: Bolder City, Hoover Dam, Barstow, Mountain View, 600 miles

Saturday, November 18, 2006

Close Call

After an unsuccessful attempt to get /etc/acpi/action/sleep.sh to work (properly), the hard drive froze up after the lid was opened after closing. Even reboot could not help, a hard disk volume error was found and self-correction failed. System entered read-only mode, requring root privilige.

I was scared. Having poked around as root for some minor system setups and installations, I NEVER did anything related to system recovery.

I had 2 choices:

1) install FC6, it's about time to upgrade from FC4 anyway, but doing so I will lose all my data on the corrent FC4, including some project data (code) and all the network configurations I just finished.

2) try to fix the currupted file system, even though I have no clue.

Realising that failing to do (2) would still allow me to do (1) as a last resort, I held my breath and marched on. Having absolutely no idea what I was doing, I logged in as root and followed the instructions given by the system, word by word as I went alone. I turned out that it was mostly some (about 200) inodes were messed up and I was fixing them with the help of the system. And then, after reboot, it worked :)

System fully recovered and running without a problem.

Saturday, November 11, 2006

Sunday, November 05, 2006

Saturday, November 04, 2006

Teeth


A week ago, I felt some scratching of my mouth against my teeth in the upper back. Turns out they are the wisdom teeth, and there are a few cracks on them. Doctor suggested surgical extraction.

So here I am today at the dentist's clinic. Ready to have 2 of my wisdom teeth taken out. I was told not to eat or drink anything at all 8 hours prior to the surgery. I did not understand why. It turns out that it is because they do not want me to throw up in the middle of the procedure because the anesthesia might cause vomiting. I did not want that to happen anyway. So some starving is rightfully necessary.

I was given general anesthesia through a needle in my right arm. 15 seconds after the doctor put in the drug, I did not know anything, I did not even know that I passed out. When I woke up, it seems that nothing ever happened ... First thing I thought of after waking up, was that some of the stuff in Hollywood movies might be true ... This is much better than my last encounter with anesthesia, when it did not kick in until 3 hours after the whole thing was over ...

Anyway, I was then transferred from the surgery room to a regular room. I walked all the way there, did not feel any dizziness or disoriented except that my eyes are kind of reluctant to focus so I cannot see very far. I probably looked weird with my left eyeball out of synch with the right one 8-). I envisioned a lap around Thunerhill just to make sure nothing is wrong with my head.

Then the nurse called in my wife and let us watch a video together about things to be aware of after the surgery. However, the computer crashed.

We eventually left the clinic after watch the video. I was feeling ok. Probably the doctor injected some pain killer into my teeth area because I am not feeling any pain at all even though I am now completely awake.

Now it just the beginning. The days after the surgery is supposed to be worse than the extraction itself. I cannot eat solid food for a few days (I've been eating a lot recently just in case). And there is expected to be some pain but I've already told my boss that I might have to take a day or two off.

Wait and see.

Loser Wins 2006 MotoGP


That's life. Rules are rules.

Monday, October 30, 2006

Failed to Put T41 into Sleep on FC4

Sort of. It goes to sleep after the lid is closed, but wakes up with a crazy hard drive.

Sunday, October 29, 2006

Procrastination

The Government Thinks I Am Underpaid

According to the letter I received in the mail from the US Department of Labor, I should have a 25.9% salary increase, in order to bring my wage up to the local average.

Do you hear it, HR?

Wednesday, October 18, 2006

Who The F*&% Wrote the Screenplay?!

Ever since Zhang-Yimou thought he could write a story and get funding for Zhang-Ziyi to get half naked, Chinses directors and producers have been f*&%ing themselves. The emergence of CGI and big money made the transition of Chinses theater from pure propaganda to expensive shit in 3 minutes.

(to be continued)

Monday, October 16, 2006

Wife is using sudo

Wife is using sudo command from command line, guided by some forum posts in the attempt to fix the (lost of) sleep problem in MacBook power management.

Traffic School

Had to go to traffic school on Saturday taught by a part-time comedian in the executive room in the cafe of a golf course next to a flying club based on the local airfield.

Case dismissed.

Saturday, October 07, 2006

Monday, September 25, 2006

Airport Express Printer Setup


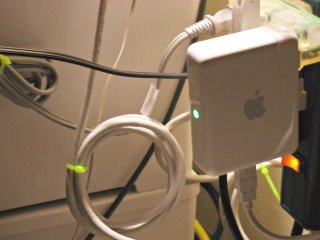
After a visit to the Apple Store, it turns out that the reason the new HP PhotoSmart 3180 did not work with Airport Express out of the box is due to HP driver. At the genius bar the guy did not use the manufacture's installation disk but instead used the GIMP driver that comes with OSX and the wireless printing worked in minutes. The genius bar closes at 6pm on Sunday, I walked in at 5:48pm and walked out of the store at 5:59pm.

Now that it works fine with OSX and XP, I start to think maybe it works with Linux as well. Tried it in Fedora Core 4:

Select "Networked JetDirect" printer queue type when adding new computer using the printer utility in Fedora Core 4. When promted to fill in the printer and port, I use the IP of the printer (10.0.1.8) for "printer" field and leave the port as default (9100). There is no HP PhotoSmart 3100 series in the driver list provided by Fedora Core 4, I tried PhotoSmart p1100 which is close to the GIMP driver used by the genius at Apple store. The printer did print, but the page is distorted. So I went back to the HP driver list and selected PhotoSmart 2600 which is the closest to 3180 in the list. This time it works fine (so far).

Thursday, September 21, 2006

Richard Hammond In Critical Serious Condition


TV host seriously hurt in crash
Richard Hammond
The presenter is being treated at Leeds General Infirmary

Top Gear's Richard Hammond is seriously ill in hospital after a crash in a jet-powered car while filming for the BBC programme.

The 36-year-old presenter was taken by air ambulance to Leeds General Infirmary's neurological unit.

A spokesman for the hospital said Mr Hammond was "stable".

Mr Hammond had been driving a dragster-style car capable of reaching speeds of up to 300mph at the former RAF airfield in Elvington, near York.

The crash will be investigated by the Health and Safety Executive and the BBC.


Thursday, September 14, 2006

ThinkPad Fixed


I have to say it is pretty good.

From the day I called the service center to the day I received the fixed machine, only 10 days. This includes Labour Day holiday, 2-way transpotation (DHL overnight covered by IBM), and a re-deliver because I was not at home at the first delivery attempt (I wasn't expecting it to show up so quickly).

So all things considered, it is not too bad. 2-year old machine gets fixed rapidly at no cost with no questions asked. The only compariable experience was with Apple. The iBook got a few recalls and services, all at zero cost with a fast turnaroud (desk to desk) time of about a week.

Sharing Printer From Ubuntu

server:
Ubuntu 6.06, HP Deskjet 3820 connected via USB

client:
Fedora Core 4 on IBM T41(OK)
WinXP on IBM T41(OK)
OSX 10.2.8 on iBook G3(not working)

I found this article:
https://help.ubuntu.com/community/NetworkPrintingFromWinXP
which describes the setup for Ubuntu server and WinXP client. Again, fear of losing the actual online article, I c/p the actual content here:

NetworkPrintingFromWinXP

By following these steps, you will be able to share a printer from
your Ubuntu computer so that Windows XP and Windows 2000
computers can print to it. This document has been tested with
Ubuntu versions 5.10 and 6.06.

1) Install the printer on the Ubuntu computer
2) Open a terminal.
3) Modify /etc/cups/cupsd.conf with your favourite editor, for example

sudo gedit /etc/cups/cupsd.conf
or sudo nano -w /etc/cups/cupsd.conf

4) In this file, edit the first tag to allow connections from your network.
Assuming that your network use adresses starting with "192.168.0."
you add the following: (you only need to modify the top level (first)
Location tag because other Location tags seem to inherit permissions)

Order Deny,Allow
Deny From All
Allow From 127.0.0.1
#Modify 192.168.0.* to match your configuration.
Allow From 192.168.0.* NOTE: I used 10.0.1.*

Also set which TCP port that the printer system will accept connections
on. In Ubuntu 5.10 (Breezy) add this line under the Network Options
part of the file (somewhere around line 420), or in Ubuntu 6.06 (Dapper)
add the following line to /etc/cups/cups.d/ports.conf:

 Port 631

and comment out:

 Listen 127.0.0.1:631    NOTE: mine is localhost:631, also comment this out

5) Save the file and exit the editor. Now restart the printing system with
this command:

sudo /etc/init.d/cupsys restart

6) Now add the printer to the Windows computer by using the Windows
"Add Printer" Wizard. Type in the following in the printer URL:

http://192.168.0.100:631/printers/Deskjet-940C
NOTE: mine is http://10.0.1.3:631/printers/Deskjet-3820

Replace "192.168.0.100" with the IP adress of the Ubuntu box. Replace
"Deskjet-940C" with your printer's name.

If you add this entry to C:\WINDOWS\system32\drivers\etc\hosts
NOTE: didn't do this

192.168.0.100   printer-server

replacing "192.168.0.100" with the IP adress of the Ubuntu box, then
you can use a URL like

http://printer-server:631/printers/Deskjet-940C

You should use the appropriate Windows printer driver for your printer. CategoryDocumentation

last edited 2006-07-22 20:33:00 by Mawds

NOTE:

Fedora Core 4 client setup:


When adding new printer, select IPP, fill in IP address 10.0.1.3 and printer queue printers/Deskjet-3820, system defaults port to 631 so ipp://10.0.1.3:631/printers/Deskjet-3820 is automatically generated. Everything works fine. Fedora Core has HP Deskjet 3820 driver.

WinXP client setup:

As described in the original article.

OSX 10.2.8:

Does not work. Setup is very similar to Fedora Core 4, but after adding printer and try to print, it takes forever to connect to server and never prints. Do not know if this is a 10.2.8 issue or extra server setup is needed. I try to avoid using Samba.

Monday, September 11, 2006

NFS Client Setup on OSX

Now that the old iBook is back to life and my T41 is being repaired, I need to get NFS working from the iBook.

Since I already had it working from Fedora Core 4 on T41, I figured that it should not be difficult to get it right on OSX.

First, add the IP of iBook to server side, modifiying the following files:

/etc/exports
/etc/hosts.allow


Client side:

I found this nice writeup someone did at:
http://mactechnotes.blogspot.com/2005/08/mac-os-x-as-nfs-client_31.html

Again, to avoid loosing the content of the link, I c/p the actualy post below:

Note: it seems that I do need the -P option for the NFS mount to work. From my server side firewall, I can see that a port lower than 1024 is needed for NFS. Also my previous attempts by directly using mount from command line had silently failed with an empty link, it looks like I do need the -P option. This is the only option I used.

Mac OS X as an NFS Client

Overview
I'll discuss the changes necessary to mount NFS filesystems onto a Mac OS X machine. This was originally written in the 10.1 days, but is still applicable on 10.4.2 (non-server versions tested).

The example filesystem used here will be called /exported/path from the server nfsserver. It will be mounted to /private/mnt. You will obviously want to change these to something useful and sane for your situation.

Mounting NFS filesystems on OS X can be done simply by running:

sudo mount nfsserver:/exported/path /private/mnt

This is, however, temporary (it won't live through a reboot). In order to have the system deal with mounting it for you, you could add that mount command to an rc script or create a startup script in /Library/StartupItems. The best way, however, is to add the information to NetInfo, and let the automounter handle everything.

In a nutshell, a new directory is added to NetInfo, called /mounts, and subdirectories under that specify the remote filesystems to mount.


NetInfo Changes, Graphical-Style

  1. To accomplish this in Aqua, run NetInfo Manager (located in /Applications/Utilities) and authenticate as an administrator (the little lock at the bottom of the window).
    Authenticate lock
    Authenticate lock


  2. We need to create a new directory, so click on the left-most directory (called simply, /), and create a new directory (through the button, menu option, or shortcut Cmd-N).
    This will create a new directory called new_directory, which we need to rename.
    root in the directory browser
    root in the directory browser

    Ways to create a directory
    Ways to create a directory


  3. In the bottom part of the window, double-click on new_directory in the Value(s) column, which will highlight new_directory and place the insertion point there. Simply type mounts to rename it then save changes (Cmd-S or Domain menu, and select Save) to update the browser portion of the window.
    Renaming the newly-created directory
    Renaming the newly-created directory

    Now renamed, but not saved
    Now renamed, but not saved

    Now renamed and saved
    Now renamed and saved

    Any mounts the automounter handles will be listed under this new directory in NetInfo. Let's add one.


  4. Click on mounts in the browser, and create a new directory. The value of the name property for each subdirectory in mounts specifies the remote filesystem to be mounted (in our example, nfsserver:/exported/path). Double-click new_directory in Value(s), and enter nfsserver:/exported/path. This specifies what remote filesystem to mount, but nothing else; we need to add a few more properties in this directory.


  5. Under the Directory menu is a command, New Property, which is what we will use to add the properties. Select this command three times, as we'll be specifying the local mount point, mount options, and the mount type.
    Three new properties added
    Three new properties added


  6. Double-click the first new_property and rename it to type; set the value of this property to nfs since we're doing NFS. Change the second new_property to opts, and set the value to a blank (delete what is currently there, also see the note about opts at the end, especially if you experience problems). Change the third new_property to dir and set its value to /private/mnt.
    Properties are now set
    Properties are now set


  7. Save changes. At this point, all necessary information has been loaded into NetInfo for automount to take care of the NFS mount. The only thing left is to inform the automount process that things have changed.


This can, of course, be repeated for other NFS mounts. Run through the steps for each one, then do the final step (notifying automount) after all the mounts have been entered.

NetInfo Changes, Command Line
Adding an NFS mount point via the command line is actually quite simple, once you know the secret. It involves four simple steps, one to create the new NetInfo entry, and three to add the three new properties to that

  1. To create the new entry, run

    sudo nicl . -create /mounts/nfsserver:\\/exported\\/path

    Since NetInfo uses the / to separate path components, and we have / characters in the entry we want to create, they have to be escaped.
    This is done with the backslash, \, and since we are running in a shell, we need to double them up. After the shell is done examining the command, the string \\/ becomes \/ which is what we need to pass to nicl. If we don't use any backslashes, nicl will end up creating an entry /mounts/nfsserver: which has a subdirectory exported and that would have a subdirectory path. This is definitely not what we want.
    Basically, double-backslash the forward slashes in the NFS server's path (/exported/path), but not the NetInfo path (/mounts/).


  2. Now we need to add the three properties which tell automount about this entry. We need type which we set to nfs; opts, set to an empty string (but see the note about opts, below, if you have problems); and dir, set to the local mount point, /private/mnt. This is done:

    sudo nicl . -append /mounts/nfsserver:\\/exported\\/path type nfs
    sudo nicl . -append /mounts/nfsserver:\\/exported\\/path opts ""
    sudo nicl . -append /mounts/nfsserver:\\/exported\\/path dir /private/mnt

    The interesting thing to note is /private/mnt doesn't have any escaped forward slashes. This is due to the data being given to nicl in this case is a value, not a NetInfo path, so we needn't do any escaping this time. These commands simply append the given property to our newly-created NFS entry, and give those properties appropriate values.


  3. The last step is to notify automount that there are changes.


As with the graphical version, this can be repeated for all necessary NFS mounts you need to have on your OS X machine. Add them all, then notify automount.

Final Step: Tell automount
The automount process now needs to be told that new information is available for it to use. You can either simply reboot, or run the following in Terminal:

sudo kill -1 `cat /var/run/automount.pid`

This will send a HUP signal to the automount process; note those are backticks, not the normal single quote marks. A HUP causes automount to unmount anything not busy, reread configuration, and start anew.

A Few Notes to Know

  • Local mount point, availability
    The first thing to note is the local mount point (once automount takes it) becomes a symlink. It should point to /automount/private/mnt, as that's where automount puts all of its mount points. Then, when the symlink is accessed, automount will live up to its name by automatically mounting the proper NFS server's filesystem. This is one reason why using automount is better than a static mount in some startup script: if the NFS server is down, it won't matter until you try to access the mount; with a static mount, booting up the client will take several minutes while it times out waiting for the down server.


  • opts
    The other thing to note is, if your NFS server requires a client to be coming from a privileged network port (less than 1024), you will need to add -P to the opts property, instead of the empty string. You can also modify the server to allow 'insecure' ports, but using -P doesn't require root access to the server.
    This will be the case with certain BSD-based servers and some Linux ones as well. If the local mount point becomes a symlink (as discussed above), but doesn't have any of the files expected from the server, try adding the -P option, then tell automount. If the mount still doesn't work, there are other issues to deal with (a full NFS troubleshooting discussion is beyond the scope of this document).


  • Viewing /mounts from the command line
    If you want to look at what's currently in /mounts from the command line, run

    nidump -r /mounts .

    This will dump out the information recursively (what's in /mounts, and all the information pertaining to it). It should look something like

    {
    "name" = ( "mounts" );
    CHILDREN = (
    {
    "dir" = ( "/private/mnt" );
    "name" = ( "nfsserver:/exported/path" );
    "type" = ( "nfs" );
    "opts" = ( "" );
    }
    )
    }


Friday, September 08, 2006

All It Takes to Rescue an iBook


Is a vacation.

A few weeks after the hard drive on the 5-year old G3 iBook gave up, I plugged it in and powered it on. It works, again. Time to move data to server before something bad happens ...

Sunday, September 03, 2006

Got Tree?

ATI Graphics Card Problem


Today, September 3rd 2006, the ATI Mobility Radeon graphics card finally gave up and I have no display.

There was a hint of problem a few months ago, when I connected the T41 to the TV set using S-video, while the display on the TV screen was OK, the display on the laptop LCD was fuzzy: it was shaking in the horizontal direction and it was very hard to follow the mouse pointer on the screen.

This time, however, it is even worse.

It started as the previous time: screen started to oscillate in the horizontal direction with everything still visible. But when I tried to move the cursor trying to close applications before reboot, I realized that the screen was not responding: nothing was moving on the screen even if I moved the mouse and tried to type on the keyboard. I was not sure if the system was still running, but I had to use the power button to shut it down.

Then I tried to boot the machine again, and the bad news came - there was nothing on the screen. The LCD was dead black, not in black color, but in sorry-there-is-no-video-signal black. I had no idea what state the OS was in, and had no choice but to reach for the power button again.

Called IBM ThinkPad support line, it is 10pm Pacific time and the center in Atlanta is still working. After maybe 5 minutes of waiting, a service rep answered and I was shocked to realize that my 2004 T41 is still in warranty (might have saved couple of hundred $$). They will send me a box in which I will mail the machine to their service center for diagnostics and repair. At this point, it does not seem as bad as I had expected considering this laptop is my main machine (the backup machine is a 5-year-old AMD 900MHz, mentioned in a previous post). Since it is more expensive than my car I am not (able to) going to replace it any time soon. Fortunately I just did a major overhaul on the old AMD box and backed up data onto that machine, there should not be serious data loss even if IBM decides that I need new harddrive which is unlikely to happen - I was told by the support rep to keep my harddrive when mailing the machine to IBM. Looks like they won't know I am running Fedora Core 4 along with the original XP. This should not be the cause of graphics card failure, because I have been running this dual-boot setup for over 2 years.

Friday, September 01, 2006

Activate Fedora WiFi on Startup

For a while I have to use system-config-network to manually enable WiFi after each startup for Fedora. This is not only tedious, but keeps me from running netowrk-related stuff automatically on startup.

I searched around and found a post saying the following:
check if you have the file:
/etc/sysconfig/network-scripts/ifcfg-wlan0

If you don't, create it as follows:

DEVICE=wlan
BOOTPROTO=dhcp
ONBOOT=yes
ESSID=linksys

and try:
service network restart.

You might need to add some more parameters to /ifcfg-wlan0 for it to work, you can look them up in /etc/sysconfig/network-scripts/ifup-wire
less.
I looked at my system and there is a similar file:
/etc/sysconfig/network-scripts/ifcfg-dev12174
It is the one related to my current wireless setup. As I remember every time I use system-config-network to manually activate WiFi, dev12174 is the one.

I saved the original file and edited the content by changing the following line:
ONBOOT=yes
After reboot, WiFi is automatically activated :)

The new /etc/sysconfig/network-scripts/ifcfg-dev12174 file looks like:
# Please read /usr/share/doc/initscripts-*/sysconfig.txt
# for the documentation of these parameters.
IPV6INIT=no
ONBOOT=yes
USERCTL=no
PEERDNS=yes
GATEWAY=
TYPE=Wireless
DEVICE=dev0
HWADDR=hh:hh:hh:hh:hh:hh
BOOTPROTO=dhcp
NETMASK=
DHCP_HOSTNAME=
IPADDR=
DOMAIN=
ESSID=
CHANNEL=6
MODE=Auto
RATE='11 Mb/s'

I also came acroos this suggestion below. I did not use it though:
make a new file 'wifi' in your /etc/init.d directory (chmod 755 it) and edit it:

#!/bin/sh
case "$1" in
start)
echo -n "Starting WIFI Network"
iwconfig wlan0 essid "linksys"
dhclient wlan0
echo "."
;;
stop)
echo -n "Stopping WIFI Network"
ifdown wlan0
echo "."
;;
restart)
echo -n "Restarting WIFI Network"
ifdown wlan0
iwconfig wlan0 essid "linksys"
dhclient wlan0
echo "."
;;
*)
echo "Usage: /etc/init.d/wifi {start|stop|restart}"
exit 1
;;
esac

exit 0

then, make a link to this file in the appropriate runlevel directory to get it started (let's put in in runlevel2, this is the first multiuser runleve)
ln -s /etc/init.d/wifi /etc/rc2.d/SS15wifi

this should do.
if you have to restart your wifi for some reason, you can type: /etc/init.d/wifi restart

Thursday, August 31, 2006

Ubuntu QA Glitch !

On startup, my newly-installed and fully updated Ubuntu issues an error while starting X, while I have never changed anything in the default xorg.conf, there is an error message saying "(EE) no screens found".

A quick Google search of "ubuntu no screens found" immediately points to some very recent posts regarding a recent Ubuntu upgrade that breaks the Xserver, and of coz, lots of angry people:

http://enterprise.linux.com/article.pl?sid=06/08/23/137206&from=rss

Ubuntu xorg-server update breaks X: "no screens found"

IRC channels, LUG mailing lists, and Ubuntu wikis were buzzing with the news this morning that a recent Ubuntu Xorg update (xorg-server 1:1.0.2-0ubuntu10.3) crashes the X Window System on some video hardware. When X is restarted following installation, affected Ubuntu users get a "no screens found" error message instead of X.

The Dell Inspiron 6400 with an ATI video card, Dell Inspiron 8600 with an Nvidia 5200 card, Dell Latitude D620 with Nvidia Quadro NVS 110M video card, and Hewlett-Packard NX6125 are among the systems reported as being bitten by this bug.

One workaround being posted on Wikis is to downgrade to the previous version of Xorg by entering the following commands:

sudo apt-get install xserver-xorg-core=1:1.0.2-0ubuntu10
sudo /etc/init.d/gdm restart

A better workaround appears to be upgrading to xorg-server 1:1.0.2-0ubuntu10.4, after verifying that it is available in your repositories. To check and see if it is available to you, use the following commands:

sudo apt-get update
apt-cache -f search xserver-xorg-core

If the 10.4 version listed, then proceed with:

sudo apt-get upgrade

Of course, if you haven't upgraded to 10.3 yet, don't.


Bug report link:
https://launchpad.net/distros/ubuntu/+source/xorg-server/+bug/57153

Official fix procedure:
http://www.ubuntu.com/FixForUpgradeIssue

The Problem

An update was released for Dapper on 21 August 2006 UTC, which has been found to cause problems on certain systems.

A subsequent update published 17 hours later corrects this, so if your system is fully up to date now and you have no obvious graphical system failures, then you are highly unlikely to be affected. However, delays to the system of update distribution mean that you should make sure you have fully updated before rebooting your computer. You can read more about the issue to ensure you will not be affected, and learn what steps we are taking to ensure this does not happen again.

If you have been affected by this bug, you will see a screen similar to the following when booting your computer:

  • failedb.png

Corrective Action

Follow this procedure to correct the problem. You will need to be connected to the Internet for the procedure to work.

  1. At this point, hold the left Alt key and press the F1 key. You should see a screen similar to the following:

    • tty1b.png

  2. Type in your username, as you would to login to the computer, and press Enter

  3. Then type your password and press Enter. You will see a screen similar to the following:

    • passwordb.png

  4. Type sudo apt-get update and press Enter

  5. Type your password again and press Enter. You will see a screen similar to the following:

    • apt-get-updateb.png

  6. Type sudo apt-get install xserver-xorg-core and press Enter. This will install an update on your computer, and you will see the text changing on the screen. When the update is complete, you will see a screen similar to the following:

    • installed.png

  7. Hold Control and Alt and press Delete. This will reboot your system in a functional state.

Summer East Trip


From August 22nd to 29th in the year 2006, me and wife took our first trip to the east part of the United States. Although we've done some traveling since 2001, this is our very first trip outside the state of California, and the longest one. I have kept a journal along the way, whenever I could find a place to use the computer and Internet I would add to it something that happened. This document is written on Writely (www.writely.com), and it the first document I have on it. I found it quite useful.

Day 1 : Taken for A Ride, Aireline Experience, America from Above, Flying over Pentagon
Day 2 : Similar Capital, Night of Chinatown
Day 3 : New York, Apple Store and Night in the Upper West Side
Day 4 : From Shit Hole to Hyatt, from NY to NJ, Stealthy Piece of Crap, Old College Pals and Grad School People
Day 5 : The Wedding
Day 6 : The Wakeup Call, the Drive to Boston, the Hotel
Day 7 : Outsider-unfriendly City, Train Ride to NY
Day 8 : Last Day


Sunday, August 27, 2006

Hotel @ MIT


Very nice and interesting place. One thing that bothers me: the public Windows PC in the main lobby is running XP as Administrator as well as using IE as default broswer. I installed Firefox for them (using Admin of coz ...) and set it as default but did not tell anyone. Maybe some hard-core M$ people will uninstall the Firefox and undo my work. I was tempted to change the user setting but did not do it in the end. The other public computer is an iMac running OSX so it is OK.

Saturday, August 26, 2006

Lunch Reservation


Awaiting confirmation on our lunch reservation on Monday. The number is (212) 963-7625. When I called, it was just a voice mail system, instructing me to leave my name, telephone number, the date and time of our lunch and number in my party. I was expecting the reservation requirement was so they could run a security check, but they didn't even ask for the name of my guest.

Friday, August 25, 2006

Thursday, August 24, 2006

Apple Store NY


Posting from Apple Store on 5th Ave. NY:

Hello :)

Sunday, August 20, 2006

NFS Client Setup on Window XP

Google search of "nfs mount windows xp" found the following page:

http://www.oreillynet.com/cs/user/view/cs_msg/15337

Someone pointed to a Microsoft package:

http://www.microsoft.com/windows/sfu/default.asp
http://www.microsoft.com/technet/interopmigration/unix/sfu/default.mspx

It's free from microsoft, but you have to provide personal information (address).

http://www.microsoft.com/technet/interopmigration/unix/sfu/nfsauth.mspx

Introduction

Microsoft Windows Services for UNIX version 3.0 (SFUv3) includes key filesystem interoperability components that allow Microsoft Windows computers to function effectively in a Network File System (NFS) environment. These include Client for NFS, Server for NFS and Gateway for NFS. To enable these components to work effectively, SFUv3 must be able to accurately identify and authenticate users against both their native operating system and the remote operating system as appropriate. By default, NFS uses the UNIX method of identifying and authenticating users.

Note: Throughout this document, we refer to resources and authentication of UNIX users and computers. This is shorthand for UNIX and Linux users and computers.

Components

There are a number of components to Services for UNIX that are either involved in the authentication, or dependent on it. These include:

User Name Mapping Server – Maps UNIX users to Windows users and vice versa. Even when a user has exactly the same name on both systems, it is not actually the same user, so some mechanism is necessary to let the other components of SFUv3 know that Windows user jdoe is the same as UNIX user johnd.

Server for NFS Authentication – This isn't a server at all, but an authentication component used by Server for NFS. Install this component on any Windows server that might be involved in user authentication.

Server for PCNFS – This server is not used by other components of SFUv3, but can be used by other NFS programs that expect to see PCNFSD, including SFUv1.

Client for NFS – The Windows NFS client component of SFUv3. Client for NFS allows the machine on which it is installed to access and use NFS resources anywhere on the network.

Gateway for NFS – A special NFS client that enables a single Windows Server to provide access to NFS resources for other Windows computers that don't have any SFUv3 components installed at all. (Note: Client for NFS and Gateway for NFS are mutually exclusive – only one or the other may be installed on a machine.)

Server for NFS – The Windows NFS server component of SFUv3. Server for NFS allows the machine on which it is installed to provide file system resources to NFS clients anywhere on the network.


What Needs To Be Installed?

To use any of the NFS components in SFUv3, you will need to install and configure User Name Mapping Server. This is true whether you are using PCNFS or NIS for authentication. User Name Mapping Server is the core component that is required for any authentication of NFS in SFUv3.

You will also need to install the appropriate client and server components of the Services for UNIX NFS suite. To share files from a Windows server or workstation to UNIX clients, you will need to install Server for NFS on the machine providing the file services. To use files stored on UNIX hosts, you will need to install either Client for NFS or Gateway for NFS on a Windows server or workstation. You cannot install both – they are mutually exclusive. Client for NFS is appropriate for individual workstations or servers and provides access to files on the remote host for that workstation or server only. Gateway for NFS can only be installed on a server class Windows product. It provides access to files on the remote host to all Windows computers on the network, without requiring additional software on the downstream Windows computers.

HOW TO: Configure the User Name Mapping Service

How to install Client for NFS on Windows for a UNIX-to-Windows migration


What I actually did:


1. download "Window Services for UNIX": filename: SFU35SEL_EN.exe

2. run SFU35SEL_EN.exe, it is a self-extracting compressed file.

3. from the un-compressed directory, run installer: SfuSetup.msi

4. from installer GUI, select (a) User Name Mapping Server (b) NFS Client to install, igore other packages.

5. During installation, choose to use passwd and group file for authentication becaseu I am not using NIS at home. This requires /etc/passwd and /etc/groupd files to be copied from Linux NFS server to local XP machine. Provide the location of these 2 file (I copied them to c:\etc\) on the XP machine to the installation utility.

6. After installation, goto Start-> Windows Services for UNIX -> Services for UNIX Administration, which is a GUI for configuring the User Name Mapping Server and NFS Client.

7. Use simple setup for User Name Mapping Server because it is installed on the local XP machine. Use this Admin utility to automatically generate mapping config files.

8. Setup is done. Goto file explore and mount the network drive at xx.x.x.x:\mhe\amd900_export, which looks the same as Samba mount.

Viola.

Saturday, August 19, 2006

TT Project Progress

Almost fixed the mess introduced by web applications, namely, missing white spaces and insertion of new lines.

Friday, August 18, 2006

NFS

Again, post the actual article here in case the link goes bad in the future:

http://nfs.sourceforge.net/nfs-howto/


SERVER:

Setting up the server will be done in two steps: Setting up the configuration files for NFS, and then starting the NFS services.
3.2. Setting up the Configuration Files

There are three main configuration files you will need to edit to set up an NFS server: /etc/exports, /etc/hosts.allow, and /etc/hosts.deny . Strictly speaking, you only need to edit /etc/exports to get NFS to work, but you would be left with an extremely insecure setup. You may also need to edit your startup scripts; see Section 3, “Setting Up an NFS Server” for more on that.
3.2.1. /etc/exports

This file contains a list of entries; each entry indicates a volume that is shared and how it is shared. Check the man pages (man exports) for a complete description of all the setup options for the file, although the description here will probably satisfy most people's needs.

An entry in /etc/exports will typically look like this:

directory machine1(option11,option12)
machine2(option21,option22)

where

directory

the directory that you want to share. It may be an entire volume though it need not be. If you share a directory, then all directories under it within the same file system will be shared as well.
machine1 and machine2

client machines that will have access to the directory. The machines may be listed by their DNS address or their IP address (e.g., machine.company.com or 192.168.0.8 ). Using IP addresses is more reliable and more secure. If you need to use DNS addresses, and they do not seem to be resolving to the right machine, see Section 7, “Troubleshooting”.
optionxx

the option listing for each machine will describe what kind of access that machine will have. Important options are:

* ro: The directory is shared read only; the client machine will not be able to write it. This is the default.
* rw: The client machine will have read and write access to the directory.
* no_root_squash: By default, any file request made by user root on the client machine is treated as if it is made by user nobody on the server. (Exactly which UID the request is mapped to depends on the UID of user "nobody" on the server, not the client.) If no_root_squash is selected, then root on the client machine will have the same level of access to the files on the system as root on the server. This can have serious security implications, although it may be necessary if you want to perform any administrative work on the client machine that involves the exported directories. You should not specify this option without a good reason.
* no_subtree_check: If only part of a volume is exported, a routine called subtree checking verifies that a file that is requested from the client is in the appropriate part of the volume. If the entire volume is exported, disabling this check will speed up transfers.
* sync: By default, all but the most recent version (version 1.11) of the exportfs command will use async behavior, telling a client machine that a file write is complete - that is, has been written to stable storage - when NFS has finished handing the write over to the filesystem. This behavior may cause data corruption if the server reboots, and the sync option prevents this. See Section 5, “Optimizing NFS Performance” for a complete discussion of sync and async behavior.

Suppose we have two client machines, slave1 and slave2, that have IP addresses 192.168.0.1 and 192.168.0.2, respectively. We wish to share our software binaries and home directories with these machines. A typical setup for /etc/exports might look like this:

/usr/local 192.168.0.1(ro) 192.168.0.2(ro)
/home 192.168.0.1(rw) 192.168.0.2(rw)

Here we are sharing /usr/local read-only to slave1 and slave2, because it probably contains our software and there may not be benefits to allowing slave1 and slave2 to write to it that outweigh security concerns. On the other hand, home directories need to be exported read-write if users are to save their work on them.

If you have a large installation, you may find that you have a bunch of computers all on the same local network that require access to your server. There are a few ways of simplifying references to large numbers of machines. First, you can give access to a range of machines at once by specifying a network and a netmask. For example, if you wanted to allow access to all the machines with IP addresses between 192.168.0.0 and 192.168.0.255 then you could have the entries:

/usr/local 192.168.0.0/255.255.255.0(ro)
/home 192.168.0.0/255.255.255.0(rw)

See the Networking-Overview HOWTO for further information on how netmasks, and you may also wish to look at the man pages for init and hosts.allow.

Second, you can use NIS netgroups in your entry. To specify a netgroup in your exports file, simply prepend the name of the netgroup with an "@". See the NIS HOWTO for details on how netgroups work.

Third, you can use wildcards such as *.foo.com or 192.168. instead of hostnames. There were problems with wildcard implementation in the 2.2 kernel series that were fixed in kernel 2.2.19.

However, you should keep in mind that any of these simplifications could cause a security risk if there are machines in your netgroup or local network that you do not trust completely.

A few cautions are in order about what cannot (or should not) be exported. First, if a directory is exported, its parent and child directories cannot be exported if they are in the same filesystem. However, exporting both should not be necessary because listing the parent directory in the /etc/exports file will cause all underlying directories within that file system to be exported.

Second, it is a poor idea to export a FAT or VFAT (i.e., MS-DOS or Windows 95/98) filesystem with NFS. FAT is not designed for use on a multi-user machine, and as a result, operations that depend on permissions will not work well. Moreover, some of the underlying filesystem design is reported to work poorly with NFS's expectations.

Third, device or other special files may not export correctly to non-Linux clients. See Section 8, “Using Linux NFS with Other OSes” for details on particular operating systems.
3.2.2. /etc/hosts.allow and /etc/hosts.deny

These two files specify which computers on the network can use services on your machine. Each line of the file contains a single entry listing a service and a set of machines. When the server gets a request from a machine, it does the following:

1. It first checks hosts.allow to see if the machine matches a rule listed here. If it does, then the machine is allowed access.
2. If the machine does not match an entry in hosts.allow the server then checks hosts.deny to see if the client matches a rule listed there. If it does then the machine is denied access.
3. If the client matches no listings in either file, then it is allowed access.

In addition to controlling access to services handled by inetd (such as telnet and FTP), this file can also control access to NFS by restricting connections to the daemons that provide NFS services. Restrictions are done on a per-service basis.

The first daemon to restrict access to is the portmapper. This daemon essentially just tells requesting clients how to find all the NFS services on the system. Restricting access to the portmapper is the best defense against someone breaking into your system through NFS because completely unauthorized clients won't know where to find the NFS daemons. However, there are two things to watch out for. First, restricting portmapper isn't enough if the intruder already knows for some reason how to find those daemons. And second, if you are running NIS, restricting portmapper will also restrict requests to NIS. That should usually be harmless since you usually want to restrict NFS and NIS in a similar way, but just be cautioned. (Running NIS is generally a good idea if you are running NFS, because the client machines need a way of knowing who owns what files on the exported volumes. Of course there are other ways of doing this such as syncing password files. See the NIS HOWTO for information on setting up NIS.)

In general it is a good idea with NFS (as with most internet services) to explicitly deny access to IP addresses that you don't need to allow access to.

The first step in doing this is to add the followng entry to /etc/hosts.deny:

portmap:ALL

Starting with nfs-utils 0.2.0, you can be a bit more careful by controlling access to individual daemons. It's a good precaution since an intruder will often be able to weasel around the portmapper. If you have a newer version of nfs-utils, add entries for each of the NFS daemons (see the next section to find out what these daemons are; for now just put entries for them in hosts.deny):

lockd:ALL
mountd:ALL
rquotad:ALL
statd:ALL

Even if you have an older version of nfs-utils, adding these entries is at worst harmless (since they will just be ignored) and at best will save you some trouble when you upgrade. Some sys admins choose to put the entry ALL:ALL in the file /etc/hosts.deny, which causes any service that looks at these files to deny access to all hosts unless it is explicitly allowed. While this is more secure behavior, it may also get you in trouble when you are installing new services, you forget you put it there, and you can't figure out for the life of you why they won't work.

Next, we need to add an entry to hosts.allow to give any hosts access that we want to have access. (If we just leave the above lines in hosts.deny then nobody will have access to NFS.) Entries in hosts.allow follow the format:

service: host [or network/netmask] , host [or network/netmask]

Here, host is IP address of a potential client; it may be possible in some versions to use the DNS name of the host, but it is strongly discouraged.

Suppose we have the setup above and we just want to allow access to slave1.foo.com and slave2.foo.com, and suppose that the IP addresses of these machines are 192.168.0.1 and 192.168.0.2, respectively. We could add the following entry to /etc/hosts.allow:

portmap: 192.168.0.1 , 192.168.0.2

For recent nfs-utils versions, we would also add the following (again, these entries are harmless even if they are not supported):

lockd: 192.168.0.1 , 192.168.0.2
rquotad: 192.168.0.1 , 192.168.0.2
mountd: 192.168.0.1 , 192.168.0.2
statd: 192.168.0.1 , 192.168.0.2

If you intend to run NFS on a large number of machines in a local network, /etc/hosts.allow also allows for network/netmask style entries in the same manner as /etc/exports above.
3.3. Getting the services Started
3.3.1. Pre-requisites

The NFS server should now be configured and we can start it running. First, you will need to have the appropriate packages installed. This consists mainly of a new enough kernel and a new enough version of the nfs-utils package. See Section 2, “Introduction” if you are in doubt.

Next, before you can start NFS, you will need to have TCP/IP networking functioning correctly on your machine. If you can use telnet, FTP, and so on, then chances are your TCP networking is fine.

That said, with most recent Linux distributions you may be able to get NFS up and running simply by rebooting your machine, and the startup scripts should detect that you have set up your /etc/exports file and will start up NFS correctly.

3.3.4. Verifying that NFS is running

To do this, query the portmapper with the command rpcinfo quota to find out what services it is providing. You should get something like this:

program vers proto port
100000 2 tcp 111 portmapper
100000 2 udp 111 portmapper
100011 1 udp 749 rquotad
100011 2 udp 749 rquotad
100005 1 udp 759 mountd
100005 1 tcp 761 mountd
100005 2 udp 764 mountd
100005 2 tcp 766 mountd
100005 3 udp 769 mountd
100005 3 tcp 771 mountd
100003 2 udp 2049 nfs
100003 3 udp 2049 nfs
300019 1 tcp 830 amd
300019 1 udp 831 amd
100024 1 udp 944 status
100024 1 tcp 946 status
100021 1 udp 1042 nlockmgr
100021 3 udp 1042 nlockmgr
100021 4 udp 1042 nlockmgr
100021 1 tcp 1629 nlockmgr
100021 3 tcp 1629 nlockmgr
100021 4 tcp 1629 nlockmgr

This says that we have NFS versions 2 and 3, rpc.statd version 1, network lock manager (the service name for rpc.lockd) versions 1, 3, and 4. There are also different service listings depending on whether NFS is travelling over TCP or UDP. Linux systems use UDP by default unless TCP is explicitly requested; however other OSes such as Solaris default to TCP.

If you do not at least see a line that says portmapper, a line that says nfs, and a line that says mountd then you will need to backtrack and try again to start up the daemons (see Section 7, “Troubleshooting” if this still doesn't work).

If you do see these services listed, then you should be ready to set up NFS clients to access files from your server.

3.3.5. Making Changes to /etc/exports later on

If you come back and change your /etc/exports file, the changes you make may not take effect immediately. You should run the command exportfs -ra to force nfsd to re-read the /etc/exports file. If you can't find the exportfs command, then you can kill nfsd with the -HUP flag (see the man pages for kill for details).

If that still doesn't work, don't forget to check hosts.allow to make sure you haven't forgotten to list any new client machines there. Also check the host listings on any firewalls you may have set up

CLIENT:

With portmap, lockd, and statd running, you should now be able to mount the remote directory from your server just the way you mount a local hard drive, with the mount command. Continuing our example from the previous section, suppose our server above is called master.foo.com,and we want to mount the /home directory on slave1.foo.com. Then, all we have to do, from the root prompt on slave1.foo.com, is type:

# mount master.foo.com:/home /mnt/home

and the directory /home on master will appear as the directory /mnt/home on slave1. (Note that this assumes we have created the directory /mnt/home as an empty mount point beforehand.)

If this does not work, see Section 7, “Troubleshooting”.

You can get unmount the file system by typing:

# umount /mnt/home

Just like you would for a local file system.
4.2. Getting NFS File Systems to be Mounted at Boot Time

NFS file systems can be added to your /etc/fstab file the same way local file systems can, so that they mount when your system starts up. The only difference is that the file system type will be set to nfs and the dump and fsck order (the last two entries) will have to be set to zero. So for our example above, the entry in /etc/fstab would look like:

# device mountpoint fs-type options dump fsckorder
...
master.foo.com:/home /mnt nfs rw 0 0
...

See the man pages for fstab if you are unfamiliar with the syntax of this file. If you are using an automounter such as amd or autofs, the options in the corresponding fields of your mount listings should look very similar if not identical.


4.3. Mount Options
4.3.1. Soft versus Hard Mounting

There are some options you should consider adding at once. They govern the way the NFS client handles a server crash or network outage. One of the cool things about NFS is that it can handle this gracefully. If you set up the clients right. There are two distinct failure modes:

soft

If a file request fails, the NFS client will report an error to the process on the client machine requesting the file access. Some programs can handle this with composure, most won't. We do not recommend using this setting; it is a recipe for corrupted files and lost data. You should especially not use this for mail disks --- if you value your mail, that is.
hard

The program accessing a file on a NFS mounted file system will hang when the server crashes. The process cannot be interrupted or killed (except by a "sure kill") unless you also specify intr. When the NFS server is back online the program will continue undisturbed from where it was. We recommend using hard,intr on all NFS mounted file systems.

Picking up from the previous example, the fstab would now look like:

# device mountpoint fs-type options dump fsckord
...
master.foo.com:/home /mnt/home nfs rw,hard,intr 0 0
...

The rsize and wsize mount options specify the size of the chunks of data that the client and server pass back and forth to each other.

The defaults may be too big or to small; there is no size that works well on all or most setups. On the one hand, some combinations of Linux kernels and network cards (largely on older machines) cannot handle blocks that large. On the other hand, if they can handle larger blocks, a bigger size might be faster.

Getting the block size right is an important factor in performance and is a must if you are planning to use the NFS server in a production environment. See Section 5, “Optimizing NFS Performance” for details.

Tuesday, August 15, 2006

Pushing the Limit of PC Enclosure Design

* good air-flow with open box
* never lose Wi-Fi connection (gluded to tape)
* easy access
* low cost (2 ft. tape)

OS Upgrade on 5-year Old PC

Stuck with 5-year old AMD 900M Hz COMPAQ and increasingly scared by the dying M$ Win2k, I finally decided to take the risk and upgrade the system to Ubuntu 6.06.1.

There is only 1 CD-ROM for Ubuntu installation which is awsome, considering that when I bought the COMPAQ 5 years ago DVD drive was kind of luxury so I do not have it, this is the only way I could have gone to install the system. I had considered network installation of SuSe, but I do not have a network cable long enough to go through the stairs from the first floor. So Wi-Fi has to work or I will be totally screwed - the hard drive is only as big as 30GB (well, back in 2001...) and I had to wipe off the old Win2k.

I started only to find out that during the years the optical drive on the machine has silently died somehow without a trace. I tried everything to have no effect. Then I realized that 4 years ago I bought another drive and it must be sitting somewhere in the house because I do not remember selling it or giving it away. I was happy to find it in the closet and now I have a working optical drive on the old PC.

Ubuntu installation is not pretty but it is good. The process is very smooth and straightforward. At the end the only thing that did not work out of the box is Wi-Fi. Since I have been using this $10 D-Link DWL-122 which was not popolar to start with, I sort of expected some hardship. But the following article in Ubuntu support pages turned out to be very valuable and accurate. I cannot afford to lose them by saving the URL only. So I am c/p the entire sections I have used below.


https://help.ubuntu.com/community/WifiDocs/Driver/prism2_usb

WifiDocs/Driver/prism2 usb

1. Driver Information

  • Driver Name: prism2_usb / Prism II

  • Module Name: prism2_usb

First of all, install the linux-wlan-ng package to use this driver! It is included on all Ubuntu 6.06 CDs.


NOTE: The linux-wlan-ng is only on the CD, not on the hard drive after installation. So I loaded the CD from the Synaptic Package Manager and then install it from there.

2. Support Channels

See also WifiDocs/Device/DWL-122 and WifiDocs/Device/NetgearMA111 for help on configuration.


https://help.ubuntu.com/community/WifiDocs/Device/NetgearMA111


WifiDocs/Device/NetgearMA111

Purpose

This howto will setup wireless networking using the Netgear MA111 wireless USB adapter or many other wireless USB adapters which use the WifiDocs/Driver/prism2_usb driver. This card is now pretty easy to setup on Ubuntu 5.10 (Breezy) and 6.06 (Dapper), as the driver module is present in the kernel.

  • IconNote.png There are apparently two versions of the card floating around, this method will work only with the v1 (or no version number) of the Netgear MA111 card. See the [WWW] vendor product page.

Check driver is loaded

First, plug in your MA111 USB wireless card and see if it is detected and the appropriate modules are loaded. Open up a terminal and execute the following command

$ lsmod | grep prism
prism2_usb xxxxx 0
ieee80211 xxxxx 1 prism2_usb
usbcore xxxxx 3 prism2_usb,ohci_hcd

If you see an output similiar to this, your card has been detected and appropriate modules loaded. If not, you must manually load the driver by issuing the following command

sudo modprobe prism2_usb

Next, we must alias the wlan0 to the prism2_usb device. In Ubuntu 5.10 (Breezy), do this by adding the following to /etc/modprobe.conf. In Ubuntu 6.06 (Dapper) do this by adding the following to /etc/modprobe.d/wlan (only if needed):

alias wlan0 prism2_usb

Install needed package

Since the driver does not support wireless extensions completely, we have to install the following package. You will find this package on the install cd. If you installed from the Ubuntu 6.06 (Dapper) Desktop (live) cd, you will have to add the repository on that cd to your package manager's list. It is as simple as inserting the cd and clicking on the box that appears on your ubuntu desktop to do this. Alternatively, from the command line, you can run

sudo apt-cdrom add

If you installed your ubuntu system from the Ubuntu 6.06 (Dapper) alternate (install) cd, these packages are already part of your repository list, and you do not have to add them to your list again.

sudo apt-get install linux-wlan-ng

Edit interfaces file

Open up the file /etc/network/interfaces in your favorite text editor. Add the following lines to it (replace your_essid and xx:xx:xx:xx:xx with your network name and WEP key):

auto wlan0 # Remove or comment out if you don't want it to start at boot

iface wlan0 inet dhcp # If you want dhcp for wireless. Otherwise replace "dhcp" by "static" and see "man interfaces"
wireless_mode managed
wireless_essid your_essid
# Comment out the lines below if you don't have wireless encryption. See /usr/share/doc/linux-wlan-ng/README.Debian
wireless_enc on
wlan_ng_key0 xx:xx:xx:xx:xx
wlan_ng_authtype opensystem

Ready to go

Unplug/replug your wireless card or reboot your system. After it boots up, check if your wireless works. The network connection should be made automatically every time you insert the device. You may try to enable the connection by hand by issuing the following commands:

sudo ifup wlan0

This should ensure that you are connected to the network.